|
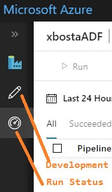
One of the challenges of ADF is getting a pipeline to run demand. I am told by Microsoft that the next version of ADF coming fall 2017 will include this functionality, but right now, there is no <Run Now!> button to be found. Granted, you will find a rerun button in the ADF Monitor Console (orange box below) ... 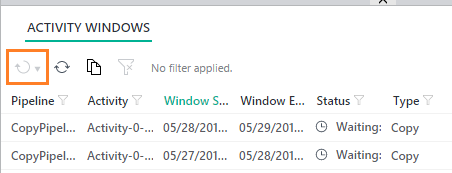 ... but this button is only enabled for failed pipelines. What about during development? Those of us coming from SSIS expect <execute> now functionality, but with ADF, there is no such thing because the pipeline is tied to the job schedule. This is when I remind myself that just because something is different, it doesn't make it wrong. Okay, so let's work with what we have. First an assumption: We do not want to have to use a custom .NET activity, PowerShell command, or Azure job scheduler. The scenario is development mode and all we want to do is test to see if our new datasets and pipeline are producing the desired result. Second, recall that in order for an activity to run on demand, ADF compares the "start" property of the pipeline to the last run DateTime of each dataset and there is no way to remove dataset execution history. Consequently, there are two ways to start a non-failed pipeline on demand: 1. Clone, delete and redeploy the datasets used in the pipeline. 2. Change the "start" property of pipeline to an earlier point in time Option #1: Clone, delete and redeploy the datasets The first thing you will run into is dependencies. This isn't a big deal if your pipeline only has one set of input/output datasets. However, when you are working with a pipeline containing a plethora of tables or files, this becomes a time consuming and outright ridiculous option. 1. Navigate to Azure Data Factory Author and Deploy action 2. Select each input and output dataset used in the pipeline 3. Click <Clone> 4. Right mouse click on each dataset you just cloned and <delete> 5. From the set of Drafts created in step #3, click <deploy> 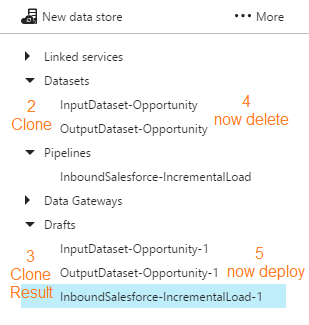 Be aware of "start", "end" and "pipelineMode" pipeline properties before you redeploy. The pipeline "start" is UTC time and must be the current UTC DateTime or a DateTime in the past, or the pipeline won't start. If you have cloned a paused pipeline, you will also need to change the "pipelineMode" property to "Scheduled".
As a matter of habit, I clone, delete and redeploy both my datasets and my pipeline to remove all internal run history. You could change the activity properties of a pipeline and then just clone, delete and redeploy your input datasets, but that seems more complicated to me. For pipeline that have a limited number of activities, the clone, delete and redeploy goes pretty quick and produces the desired result: a running pipeline! Disclaimer: This is a DEV solution. If you are in PROD you will over-write existing files and folders!! Option #2: Change the "start" property of the pipeline If all your datasets are in step with each other (all have the same execution history), you can also get the activities of a pipeline to run on demand by updating the "start" property of the pipeline to a prior point in time. This will cause ADF to "backfill" the destination creating new destination files or folders for this same earlier point in time. On a full data load (a pipeline that does use a WHERE LastModified DateTime > [x]) the resulting destination files will be a duplicate of a later point in time, but at the moment, we are in DEV and are just trying to test out the input, output and resulting destination result. If you are in PROD, be very careful. Because you have not deleted anything, source files, folders or tables will not get overwritten, but you may have just caused issues for an ETL process. Disclaimer: This option has worked for me except when my pipeline has activities referencing datasets that have different execution histories. I've looked at my new (earlier) destination location and have had missing files because there has been datasets with execution histories since the dawn of time.
1 Comment
I just had the pleasure of deleting in my blog backlog, three ADFv1 blog posts in the making. The arrival of Azure Data Factory v2 (ADFv2) makes me want to stand up and sing Handel's Hallelujah Chorus. Yes, my fine friend, ADFv2 is a real game player now. Let us begin! Assumptions:
Summary: This blog post will give you examples of the following ADFv2 functionality
Setup To get "this extract start time" we obviously have to incorporate a metadata layer in our solution. ADFv2 can now Lookup to Cosmos DB as well as several other data sources listed here, but I'm an old fashioned SQL Server lady and I prefer to use an Azure Database for things like this. It doesn't hurt to keep tables and procs, like what is included in the sample t-sql file at the end of this post, in an Azure Data Warehouse, but honestly, replicated 60 times? If you can afford it, stand up a simple Azure SQL Database for metadata collection. Step #1: Create your ADFv2 control objects in your metadata SQL database
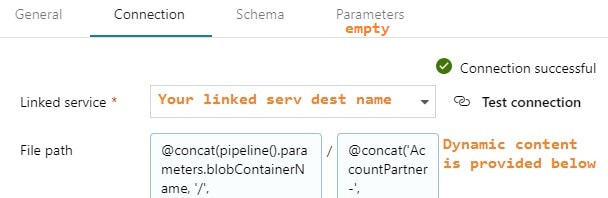
Step #2: Create your three ADFv2 linked services (data connections)
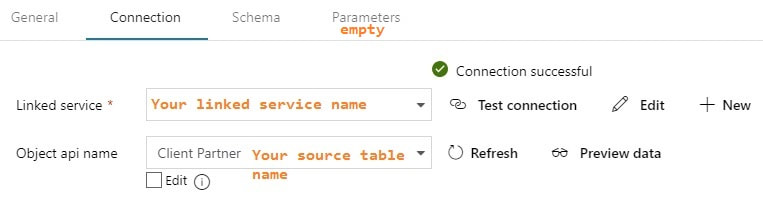
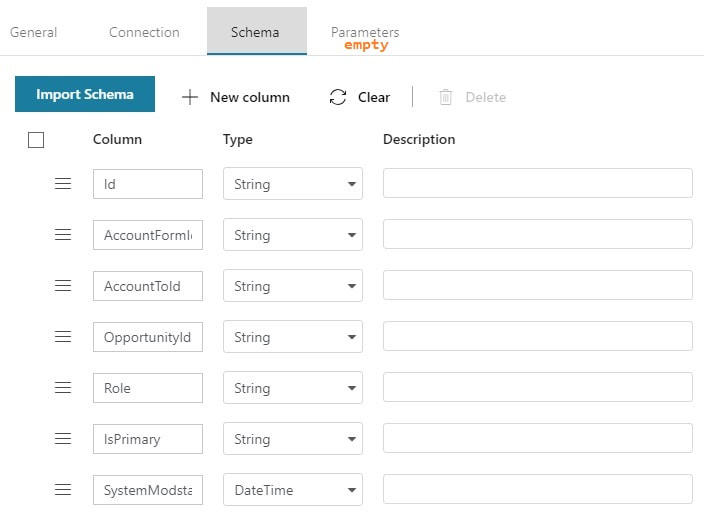
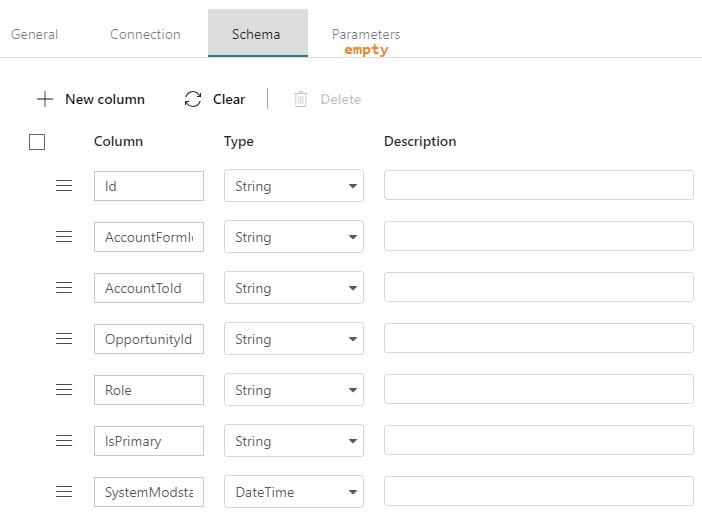
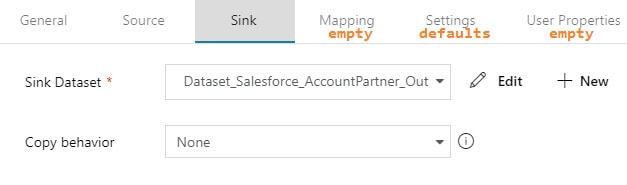
Step #3: Create your ADFv2 datasets I am going to show you screen prints here, but the JSON for these datasets is provided at the end of this blog post. This blog post uses a hard-coded table name. In blog post 2 of 3, I'll show you how to use a single input and output dataset to extract all tables from a single source. metadata DB used for all objects Your lookup and execute SQL tasks will use this same dataset. 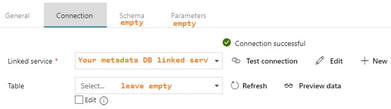 input dataset for your source This is your source dataset. You actually do not need to define every column, but we'll tackle that later.
output dataset for your destination This is your destination dataset definition. You actually do not need to define every column here either, but more on that later.
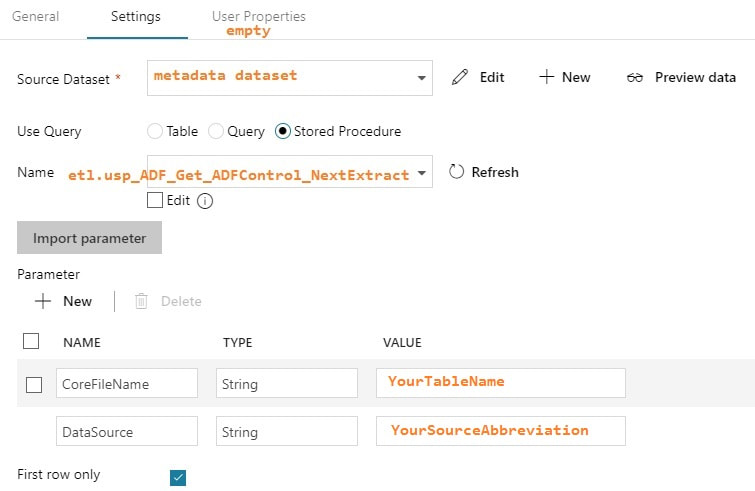
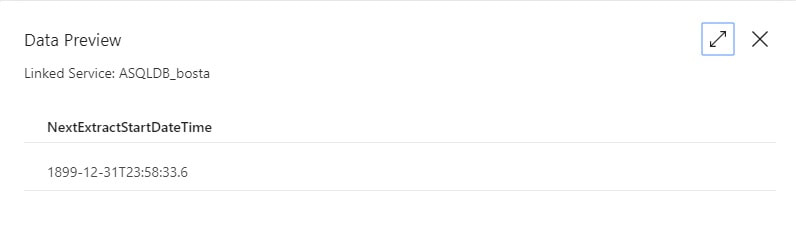
You may be thinking, "This is a lot of stuff to just import one table!" but stay tuned. I promise you, you will have less development time, cost of ownership, and less downtime by moving data with ADFv2 then you would with SSIS packages especially if you have > 2GB of data in a source object. Using parameters is the key to success. Step #4: Create your ADFv2 pipeline  Lookup Activity: GetLastExtractStart
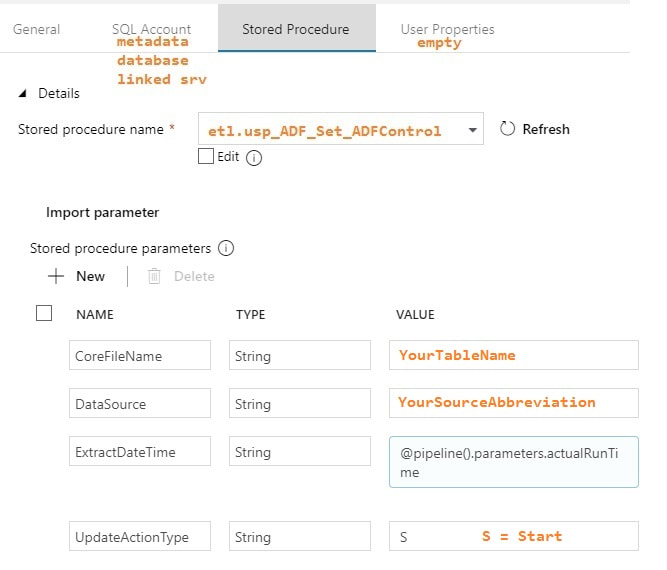
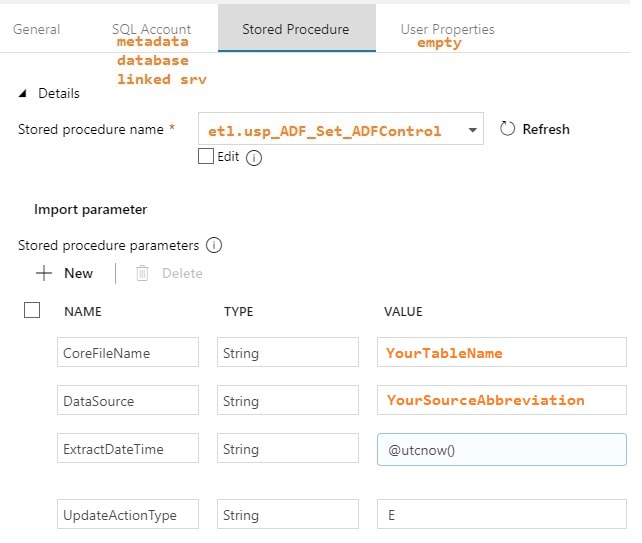
Stored Procedure Activities: Set Start and End Dates
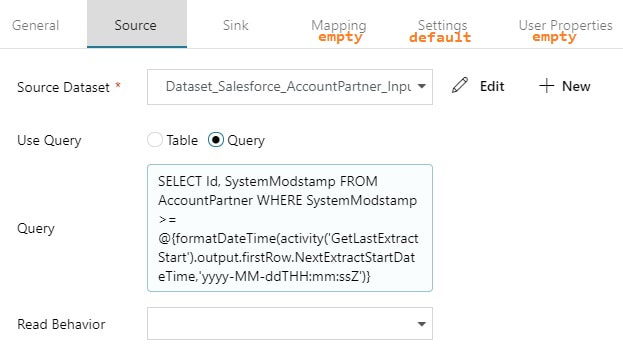
Copy Activity: The actual copy data from source to destination filtered by YourSource.LastModifiedDate
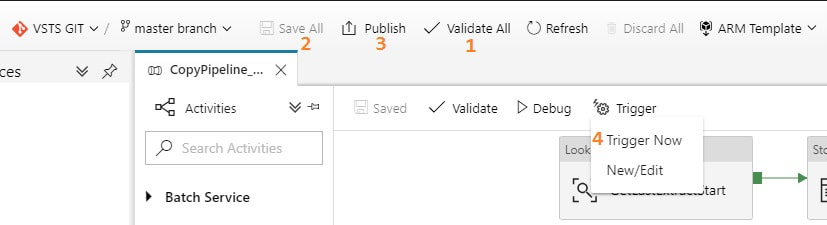
If you are new to ADFv2, here are a couple of screen prints on how to validate, save, publish and run your pipeline on demand.
Conclusion of the Matter This blog post is intended for developers just starting out in ADFv2, and especially for ADFv2 developers pulling Salesforce data. I do not expect you to have needed all the information provided, but I am hoping you'll find a tip or trick that will save you time. Referencing activities and pipeline parameters is easy to do, for example, but when I first worked on this, I found very few examples. Finding the right syntax for a Salesforce date filter took me about a week. You may be frustrated transitioning from SSIS to ADFv2, but don't give up. Remember that ADFv2 is not a data transformation tool -- it is a data copy tool. SSIS <> ADFv2, and in a world where we are moving to MPP architectures and ELT via stored procedures, ADFv2 as an "orchestrator" is worth considering. Supporting Downloadable Files
Azure Data Factory (ADFv1) JSON Example for Salesforce Incremental Load of RelationalSource Pipeline4/25/2017 What I am sharing in this blob post isn't rocket science, but when I first began working with ADF, I would have had genuine feelings of gratitude if I could have found a JSON script example for incremental loads. Consequently, this blog post is here in hopes that it finds someone who just needs a quick pick-me-up with ADF.
You will want to first reference my blog post on initial data loads with ADF because I will build here on the same resources and linked services. What is different is the pipeline JSON script. Follow the instructions for initial data load for everything else. Using the Account table from Salesforce as an example, here is what I call an incremental load pipeline: { "name": "InboundPipeline-SalesforceIncrementalLoad", "properties": { "activities": [ { "type": "Copy", "typeProperties": { "source": { "type": "RelationalSource", "query": "$$Text.Format('select * from Account where LastModifiedDate >= {{ts\\'{0:yyyy-MM-dd HH:mm:ss}\\'}} AND LastModifiedDate < {{ts\\'{1:yyyy-MM-dd HH:mm:ss}\\'}}', WindowStart, WindowEnd)" }, "sink": { "type": "AzureDataLakeStoreSink", "writeBatchSize": 0, "writeBatchTimeout": "00:00:00" } }, "inputs": [ { "name": "InputDataset-Account" } ], "outputs": [ { "name": "OutputDataset-Account" } ], "policy": { "timeout": "1.00:00:00", "concurrency": 1, "executionPriorityOrder": "NewestFirst", "style": "StartOfInterval", "retry": 3, "longRetry": 0, "longRetryInterval": "00:00:00" }, "scheduler": { "frequency": "Day", "interval": 1 }, "name": "Activity-Account" } ], "start": "2017-04-17T19:48:55.667Z", "end": "2099-12-31T05:00:00Z", "isPaused": false, "pipelineMode": "Scheduled" }, } Unfortunately at this time, the "query" property isn't that flexible. I have been told by Microsoft that the next version of ADF scheduled for release fall 2017 will include input parameters. I have tested and was able to use a REPLACE() function in the above SELECT but that is because under the covers, Microsoft is using the Simba ODBC driver for their Salesforce connection. Each data source will have different capabilities within their "SELECT..." Having identified several challenges with the current version of ADF, I was just happy to be able to use a WHERE clause. |
|||||||||||||||||||
 RSS Feed
